Thursday, January 2, 2014

Peppermintys

I hope that you have had a very Merry Christmas and a Happy start to the New Year!

We had a wonderful holiday season, and clearly a very busy one since I have been neglectful of my blog.  Poor blog.  :(

But now that I have time to breathe deeply, and even sit down, I am back to work on my 40 by 41 projects.  You'll see a completed project later this week.

First, though, I meant to share with you one of my favorite recipes that I invented when I found myself in need of a quick cookie. 

Here's the story: Several years ago, I was baking for a Cookie Walk at church.  We were told that we had to bring in four dozen cookies. I ran out of a key ingredient at ten at night and when you are a single mother and you run out of an ingredient at ten at night you are OUT.  Rather than be short on the amount of cookies, I looked around to see what else I had.  I found a roll of sugar cookie dough and a box of candy canes.

Put the two together and you get Peppermintys!


First thing is to smash the candy canes.  For a regular sized roll, I use about eight candy canes.  I put them in a plastic baggie and use a meat tenderizer to smash them (a great stress reliever if the holiday hype is getting to you).  You want to have some small chunks, not just smithereens (like I might if making Peppermint Bark). Put the smashed canes in a bowl.


I always use Pillsbury sugar cookie dough.  Set the oven to 350 as directed.  Slice the cookie dough and then roll into a ball.


 Roll in the smashed canes.

Place on parchment paper on cookie sheets.   I use parchment when baking.  I find it makes clean up a lot easier, and I can slide one sheet off the pan onto the counter to cool, and slide a prepared parchment right back on the pan, so it keeps things moving quickly


Bake for about 10 minutes.

The cookies are done when they are slightly browned around the edges.  They come out puffy but the candy canes melt in the oven and then harden into a thin, crispy cookie.


So the next time you find yourself in a pinch for Christmas cookies, make some Peppermintys.  They're quick, easy, and oooooohhh so good!

Sunday, December 15, 2013

Christmas Fixer-Upper

I have been cross stitching for nearly 30 years and if you looked at my full body of work, you would see that there are a lot of Christmas stitchings. Ornaments (lots of ornaments), tea towels, sweatshirts, scrapbook covers, and large wall hangings.

I made this one about thirteen years ago, according to the date I signed on it.  For some reason, I didn't get around to framing it until a few years ago.  By that time, I was a single mom, and I didn't really want "Celebrating Christmas Since ..." on it anymore, but I liked the stitching and didn't want such a cute piece to go to waste.  So, I picked out the words "Since 1997" and just continued the black squares across the bottom.  I found a nice red mat and a black frame and hung it for a few years.


When I got remarried though, I obviously didn't want to leave my old name on it. How lucky, that my old name and the new name have the same last few letters, so I could pick out the "FUST" and change it to "TROW".  I had to fudge the spacing a bit, as there two spaces in between each of the letters that only took up 3 spaces each. There was no way to make a W without is using 5 spaces, but because it's in the center, it works pretty well.


I also picked out the black squares at the bottom and
added "Since 2012". 

Now my Christmas house stitching reflects the family properly and I get to enjoy setting it out again.

Onto the next Christmas stitching!


Monday, December 9, 2013

Chalkboard Ornaments

When we blended families and the boys and I moved into Phil's house, I was forced to see how much crafting stuff I had accumulated.   Very often, I bought supplies that either never got finished (or let's face it, even got started) or I kept what was left over from ancient projects.  As I work on my
"40 by 41 Challenge", I search for new projects on Pinterest that will use up the supplies I already have.  It's feels great to empty out a container or shoebox full of "stuff" that might never have seen the light of day again otherwise.

When I saw the chalkboard ornaments from The Examined Life, knowing that I had a slew of little wooden shapes in the Oasis, I nearly ran to the store to load up on chalkboard paint.  I also grabbed a white paint pen.

When I dug the wooden shapes out of the drawer they had been stored in, I had to get the stickers off the backs.  Some were a little challenging, as they have been sitting there for awhile. Once all the stickers were off, I painted two coats on the good side (without the sticker residue), with a little help from my stepdaughter.  I only painted one coat on the back side.


Next, I used the white paint pen to outline the shapes - sometimes with dashes, some with dots, some with both.  Then I raided the stash for something sparkly. In the scrapbooking stuff I found a "ribbon" of holly shaped rhinestone and a holly shaped photo corner.  I used these to embellish the ornament (usually covering a spot that didn't come out as cleanly as I would have liked).


Add a little ribbon loop to the back, and we're all set!


As I mentioned in the post describing the Cinnamon Stick Stars, I wanted to give some of my good friends their Christmas treats at the beginning of the season so they could enjoy it all month long, rather than just for a few days before Christmas.  I packaged up a Cinnamon Stick Star, a Chalkboard Ornament, and a bag of Simmering Potpourri (check it out below) and delivered them  all one afternoon.  I hope my friends are enjoying their treats. 
 
What treats are you making for your friends this Christmas?
 
Simmering Potpourri
 
I found the recipe for the potpourri at Make It Do.  It includes an orange (quartered), a Tbsp. of cloves, 4 or 5 cinnamon sticks , and half a cup of cranberries.  Throw it a pot (or crock pot), add some water and enjoy.  I put all the ingredients in a treat bag, tied it off with some ribbon and wrote the instructions on a tag I made from card stock and the Creative Memories tag punch (a NECESSITY of crafting life).  Quick, easy, and so, so nice!

Tuesday, November 26, 2013

Cinnamon Stick Stars

At Christmas time, one of my greatest joys is letting my friends and loved ones know how important they are to me with a little "something".  Very often, it's lots of Christmas goodies.  My Pinterest addiction has inspired me to give them all a little seasonal gift at the beginning of Christmastide this year so that they can get in the spirit and enjoy it all month long.


The first item in the package will be a cinnamon stick star.  I pinned the idea from Rosy-Posy's blog last year, loving the idea of using up the cinnamon sticks I had left over from a previous project.  The original project crafter collected some of her supplies from the great outdoors with her children.  How cool!  I had to resort to my local craft stores, where I found cute sparkly berries, and a small wreath for the greens.


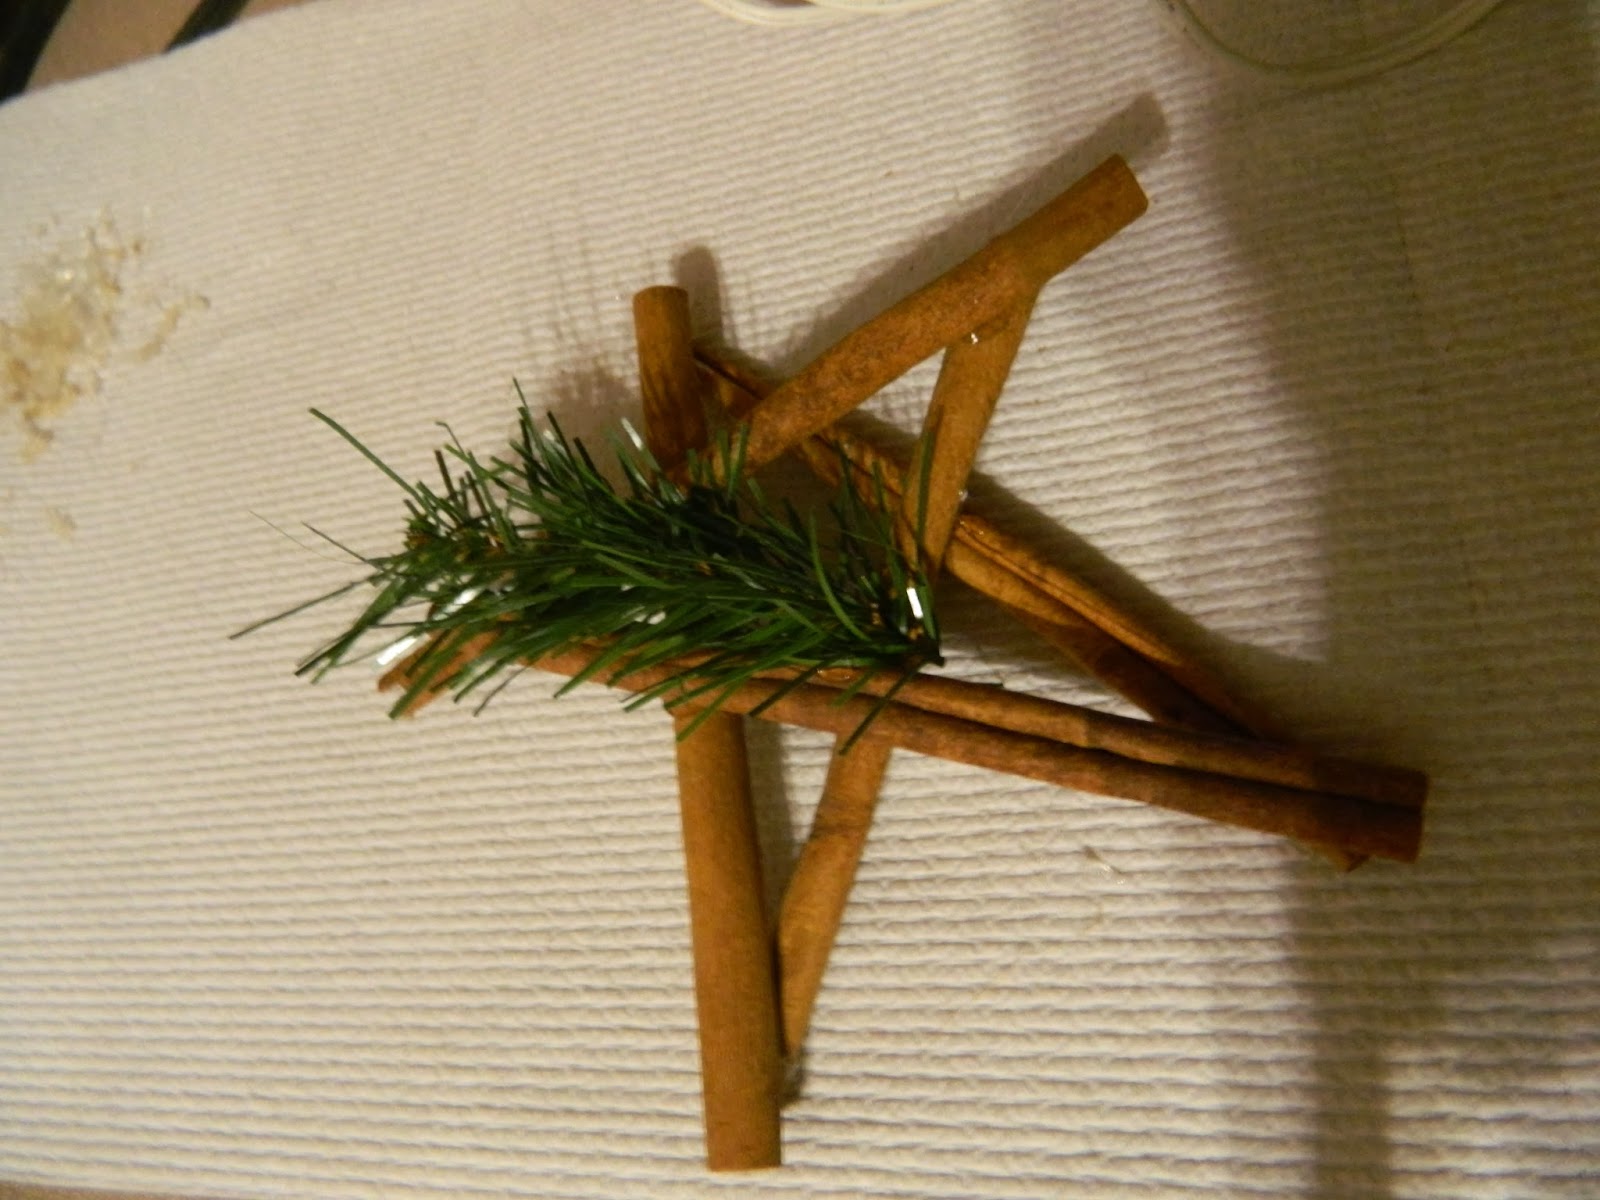
Armed with my glue gun, I tried a few different formations to get the stars to look right, and have all the sticks connect together.  Sometimes the bend or shape of the stick will determine how you place it in the star. This way seemed to work out the best:


Start with an upside-down V.  The third stick is connected under one of the arms of the V.


The fourth stick connects on top (or next to) the other arm of the V and the fifth stick connects the two lower arms, one side on top and the other under. (Remember, it depends on the bend and shape of the sticks, so each star will be a bit different).


Next, I snipped a piece of greenery off the wreath, and glued that along the left side.


Finally, I glued one of the bunches of berries into the greenery (but also made sure that it was connected to a stick below)


All we need now is a ribbon to hang it with and it's all set.  The stars came out so cute, but I don't have enough!  I need more cinnamon sticks and berries!


Too bad there isn't a 24-hour craft store around here, I'd go get some right now!

What Christmas crafts are you working on?


Saturday, November 23, 2013

Third Time's a Charm!


Getting time to chisel away at my 40 projects is proving to be harder than I thought! Especially when I get distracted by the new Nora Roberts novel, The Dark Witch. (The only problem with reading a new book in a Nora Roberts set is having to wait months to get the next one!) Ireland and magic - great combo!  It's on my list of books I have read so far since the big 4-0, along with a few Christmas novellas that "appeared" on my Kindle. Great for curling up on the sofa with a throw blanket and a cup of hot cocoa.

But for now, it's still Thanksgiving time and I have one more Thanksgiving craft to share.

I have a my ups and downs with a favorite new project - ribbon wreaths.  I saw a few different styles on Pinterest saw it as a fantastic way to use up the yards upon yards of ribbon stashed away in the Crafting Oasis.  I started with the Back to School wreath that turned out really cute - until the Styrofoam wreath form broke.  I tried to redo it on a wire wreath frame, but let's all admit it.  It turned out a hot mess.

My Halloween wreath, made on a much thicker straw wreath form, came out nicely, but when I happened upon a beautiful set of fall colored ribbons for a Thanksgiving wreath, I wanted to give the wire frame a try again.

At first, I wrapped the whole frame in a thick ribbon and tied the ribbons around the whole frame, as I had done with the Halloween wreath.  But, that wasn't working for me, so I went back to the drawing board, or rather the Pinterest board, and looked up other ways to do it.

I found a pin on my Halloween board that suggested tying the ribbons, cut only about six inches in length, all over the wreath form. 

Here's the result, and definitely my favorite choice.  I had a variety of patterns, widths, and types of ribbon (grosgrain, sheer).  It's proudly hanging on the door to my kitchen. 

 
I've been working on a Christmas one (and this time I ONLY used ribbon I already had) that's my monthly gift for my BUNCO group.  We use gifts for our prizes, but you can only spend $5.  Since all of the ribbon came out of my stash, I figure I only spent $3.50 on the wreath frame, right?
 
Here's an "in progress" shot, so you can get a sense of how to fill in the frame.


As tempting as it is to go restock my Christmas ribbon supply and make a wreath for myself, I do have a whole list of projects that I want to get started on for Christmas for others over the next several days.  (Maybe I'll hit the after-Christmas sales for ribbon for me.)  I do know that when September rolls around next year, and I pull out the bucket of decorations that holds the Back to School wreath, I will rip it all apart and retie it. 
 
Isn't that the great thing about crafts? If it doesn't come out "right" the first time, you can redo it, or tweak it, until it does come out the way you want.  And if it doesn't look exactly like the picture that inspired the project, who cares?  We get to make our own interpretation of the ideas we see and give them a punch of our own personality. 
 
Something I'll try to remind myself of as I roll up my sleeves and dive into Christmas-time. 


Saturday, November 9, 2013

Thanksgiving Trees

I think Thanksgiving is a great holiday and it gets completely overlooked by retail and the media. Two of our local radio stations started playing Christmas music on November 2nd!  The stores have stocked Christmas items for weeks, and all the Thanksgiving things have gone on clearance with the leftovers from Halloween.

Here at our house, we put Thanksgiving up as soon as we can after Halloween. There are pilgrims and turkeys and even a little fall village.

A few years ago I picked up this little set of trees at a block sale.


I leave them up all year long, changing the decorations to reflect the season. I have snowflakes, hearts, American flags, and Halloween ornaments.  I have every holiday covered except for Thanksgiving. I've searched high and low and couldn't find anything.

So I did what any good crafty girl would do - I made something!

I gathered up some solid paper, thread, buttons, and two patterned papers from a Debbie Mum pack.


First I cut out by hand the symbols and sayings that I wanted to use.  Then I glued them to the solid paper, with some thread in between for hanging.  Next I put something heavy on top and left them to sit over night.


On day two, I cut out all the shapes again, leaving a bit of colored border around each one. I had originally thought I might add buttons to embellish the little ornaments, but I think they came out just fine without anything else. The trees are rather small so I don't want to overload them.


Time to hang them up!  There's a little bit of glitter in some of the ornaments and I like how they catch  the light from the rice lights in the trees.  (I am still looking for a light string small enough to fit the smallest tree).


Hmmm.  I'm having visions of sparkly Christmas paper turned into ornaments dancing through my head.  Maybe with a baking theme.

But first, I have a few more Thanksgiving projects to do.

Stay tuned!


Wednesday, November 6, 2013

Fleece Scarves for the Food Pantry at KPC

I think I sometimes forget that there are only 24 hours in a day. That's how I would up with so many unfinished projects. (and how I have been negligent in my blog writing for two weeks - Sorry!)  I saw an idea, and thought, "oh, I can make that", forgetting about laundry, and meetings, and dinner, and that I occasionally need to sleep.  This is how I came to have several yards of fleece waiting to be turned into scarves.

Several years ago, I went to a sporting event where the cheerleaders were wearing the cutest scarves.  Someone had taken three layers of fleece in the school colors, sewn up the middle and then cut along the sides to make a fringe.  It looked like a fleece boa.  Cute and simple.  I decided to make some for all the babysitters that I had working for me (at least four or five of them) and for the women who were in my craft group that used to meet once a month. I had even asked my crafty friends what the colors of their coats were so I could make a two toned scarf to match.

(here's a shot of the scarf with one side done)


Needless to say, not all the scarves were made (although several of the sitters did get theirs for Christmas that year).

Fast forward a few years. As you my know, I work for my church as the Coordinator of Educational Ministries.  One of our other teams runs a Food Pantry two times a month and the number of people who come has steadily increased so that now, there are nearly one hundred people a month who attend.  As I was working on a knitted scarf, and thinking about how I have far too many scarves, lots of yarn waiting to be made into scarves, (that's the only thing I can knit. Hats elude me) I wondered what could I do with them all.  The Food Pantry popped into my head. Surely there are people who would appreciate a new scarf.  We do live in Buffalo, where winters can be rather harsh.  Working with the people in charge of the Food Pantry, we've invited church members to donate hats, gloves and scarves, whether home made or purchased to help our neighbors stay warm. 

And it would give me the chance to make the fleece into scarves and give them to people who really need them.  Sorry, old craft night friends, but I'm pretty sure you'll understand ;)

So, armed with a glass of wine, a few episodes of Once Upon a Time, my rotary blade cutter and some quilting rulers, I set to work.

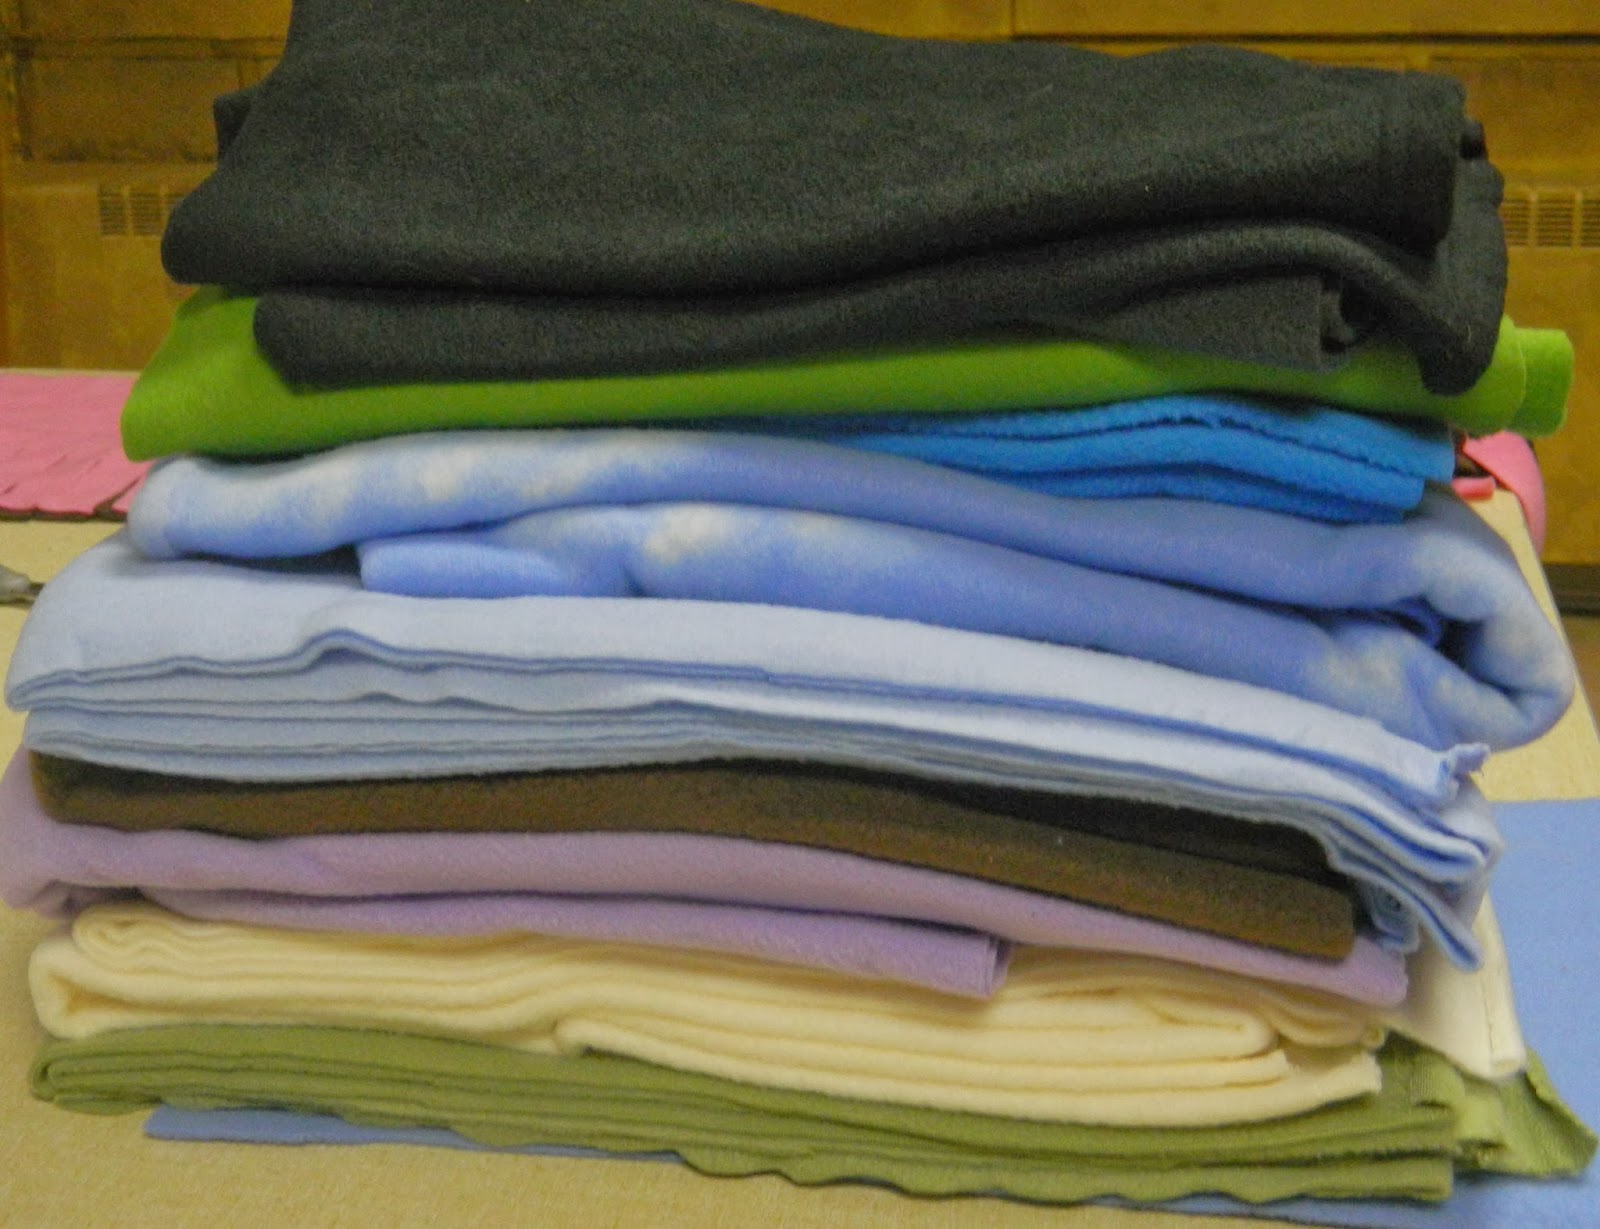
(this is the stack of uncut fleece)

If you have ever made a fleece blanket and cut all those little fleece fringes with scissors you know that it's hard on your hands.  By using a cutting mat, rulers, and rotary blade meant for quilting, it take a lot less time, and doesn't make your hands hurt.  I have a square ruler that's only 6 x 7.5 inches, which is perfect for making all those little cuts with the blade.

Scarves are pretty simple.  I varied the width and length of the scarves, and cut a simple fringe into the end.  And there you are! A nice assortment to share with our church family and neighbors.

(here's some of the finished product -that stack of fleece made 18 scarves)

What projects did you intend to do that lay unfinished (or un-started as mine were) and could be repurposed to help someone else?  Share your projects in the comments.

Hope to hear from you!