Sunday, June 22, 2014

My Famous Orange Chocolate Chunk Cookies (and bonus Honey Cookies)

I have loved to bake cookies for many years now, and I always like finding new recipes to add to my repertoire, but there are some cookies that I am known for - the orange chocolate chunk cookie is one of them.  I made a batch this week to take to my nephew's high school graduation and I thought this would be a good time to post the recipe, as so many people have asked for it.

I originally found the recipe in Mrs. Fields Best Cookie Book Ever.  I bought it years ago from a book vendor - the kind who comes to schools and leaves out some cool items for a week - so I don't even know if the book is still in print or not.

Many people have asked if I use orange chocolate.  No - here are the secret weapons for this recipe:
Orange extract and orange peel.
Here's the recipe as printed in the book with my notations in parentheses:

Orange Chocolate Chunk
2 1/2 cups all purpose flour
1/2 teaspoon baking soda
1/4 teaspoon salt
1 teaspoon grated orange peel
1 cup granulated sugar
1/2 cup (packed) light brown sugar
2 sticks (1 cup) salted butter, softened
(I only ever use buttered flavored Crisco when I bake)
2 large eggs
1 teaspoon orange extract
8 ounces semis sweet chocolate bar chopped.
(a bag of chocolate chunks or chocolate chips is fine too)

- Preheat oven to 300 (I usually do it on 350 and cut the baking time)
- In a medium bowl, combine flour, soda, salt and orange peel.  Mix well with a wire whisk and set aside/
- In a large bowl, blend sugars with an electric mixer at medium speed. Add butter and beat to form a grainy paste, scraping sides of bowl if necessary.  Add eggs and orange extract, and beat at medium speed until light and fluffy.
- Add the flour mixture and chopped chocolate. Blend at low speed just until combined. Do not over mix.
- Drop by rounded tablespoons onto ungreased cookies sheets, 1 1/2 inches apart to bake.  (Here are two of my secrets to baking success - I always use cookie scoop, like the ones from Pampered Chef, and I always use parchment - it means I can sweep the parchment and baked cookies off the baking sheet, and sweep another sheet of parchment with dough right on and back into the oven it goes.  The cookies come out nice and even and it saves a lot of time)
-Bake for 18 to 22 minutes (if baking at 350 ten minutes or so will do) until the cookies are slightly brown along the edges.  Transfer cookies immediately to a cool surface with a spatula.

One warning - the dough is fantastic even before it's baked, but don't eat too much!

Another cookie that I baked for my nephew's party is what we call Awesome Honey cookies.   A few years ago, we were studying the Beatitudes in our Sunday School. ONe of the Sundays, the kids made several different kinds of treats with honey, we sold the treats, and then used the money to buy two beehives through Heifer International.  This is one of the recipes we used, although I have no idea now where I found it.

I usually double the recipe to get a good amount of cookies.  I also discovered when I baked this week, that it's a good idea to put the batter in the fridge while there are some in the oven.  The first few sheets came out great, and then the cookies were flatter and really thin at the edges.  They still taste great though, which must be why Sam ate a dozen of them when he was home alone.

Here's the recipe as I first found it.  Sorry, I don't have pictures, but they got gobbled up so fast!

Awesome Honey Cookies
1/2 cup of butter (again, I used Crisco)
1/2 cup brown sugar
1/2 cup honey
1 egg
1 1/2 cups all purpose flour
1/2 teaspoon baking soda
1/2 teaspoon salt
1/2 teaspoon cinnamon

Heat the oven to 375

- Beat butter, sugar, honey and egg.
- Add the rest of the ingredients
- Drop spoonfuls on ungreased cookie sheets (I used the smaller cookie scoop)
- Bake for 7 to 10 minutes. Cookies will still look shiny.

Well, there you have it, two of my most asked for recipes.  I hope you enjoy them too, and remember, don't eat all the batter!

Thursday, June 12, 2014

Love in Every Stitch

   This spring, bumblebees set up housekeeping under the overhang of our dining room window.  As the drive way is right outside the dining room, this can often make more mad dashes to the car by the littlest members of our family.  When the windows are open, I can often hear their buzz as I work on projects at the dining room table.
   And I have been working!  I am so happy to be able to cross several items off the UFO lists and enter their photos in the project gallery.

   First, I finished Sam's football quilt.  How fortunate that I did not start and finish this one all at once, as the boy kept on growing! The "Big Guy" is about to turn 13.  (He calls me "Shorty" much to my chagrin, but somewhere my mother is laughing because I'm pretty sure I did the same to her).   I can't believe how the time has flown and how much he has grown up, particularly in just the past few years. I hope that his football quilt will be something that he will use for years, and always know that there is love in every stitch.


Here is a detail of the hand sewn swirls in the border.
The rest of the it was machine quilted in the ditch. 
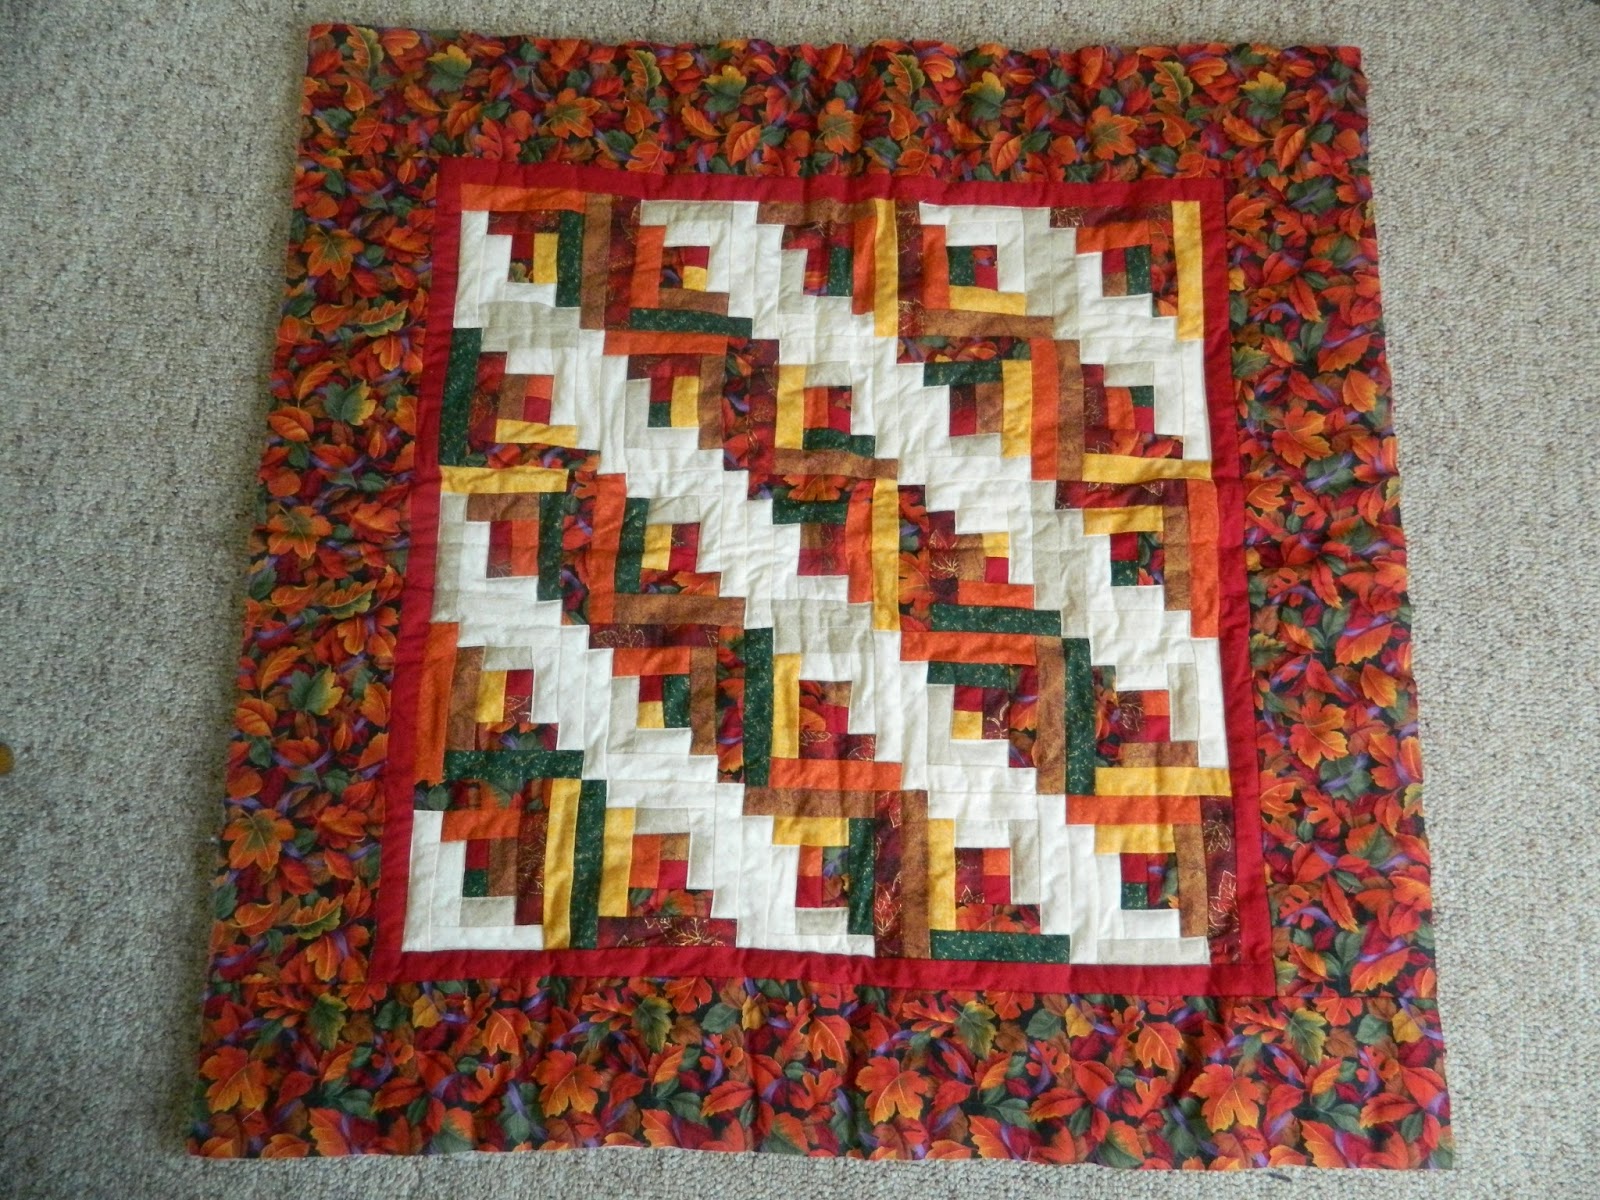
 Second, I finished the Fall Log Cabin that I had started before Sam was even born! Originally, I wanted to hand quilt leaves in the large border with metallic gold thread.  Not being able to find the leaf shaped cookie cutters I was going to use as a pattern, I looked at other leaf shapes and realized that they were very detailed for a quilt (translation - too time consuming) so instead I drew swirls - like an illustrator would use to indicate the wind had blown something - and quilted it with gold floss.   At the beginning of May I had a minor, elective surgery (nothing big!) which afforded me a few days of "down time".   Spring had finally sprung, so I took the quilt outside on our back porch and sewed while soaking up the fresh air, and listened to Siri read the newest Nora Roberts to me from my Kindle (I love that feature!).  I am rather pleased with how it turned out, and I already know the perfect place to display it this fall.


The third UFO that I can cross of the list is called Life's Treasures by Gail Bussi from the March 2010 edition of Cross Stitch and Needlework.  The living room in my old house had a "cottage" look to it - all pastels with cream and gold accents.  This piece seemed to suit the color palette well, and I thought the four words: Love, Family, Home, Friends, summed up four of the most important things in life for me. I found a nice distressed gold frame that will complement, not overpower the gentle picture. Now it will sit in the living room or dining room of our new home.

The fourth project I finished recently was not a UFO.  My winter coat is brown and blue so when I saw this gorgeous blue fuzzy, soft, yarn I grabbed two skeins (the color is not as grey in real life as it came out in the picture).  I must have started this scarf about four times - I couldn't find a pattern that I liked.  I tried several, like ribbed and seed stitch, but because of the thickness and the super fuzzy nature, you could never really see the pattern.  Finally I just did stockinette with it reversed at the edges for a little border.  I will block it to make it lay flat before I use it this winter. Maybe I'll track down another skein or two and attempt to make a hat to match!


Whew! Four things to cross of the list. That puts me at 22 projects completed, more than half way to my goal.  I know there's not a lot of time left until I turn 41, but I'll give it my best shot.  The end of school is just around the corner, so soon I'll be working on the teacher gifts I have planned.  They involve terra cotta pots and chalkboard paint.

See you soon!

Monday, April 21, 2014

Easter Cards

I hope you all had a wonderful, blessed Easter.  We went to church in the morning, which was a fantastic service, and then Phil, the big boys and I took a two hour bike ride in the afternoon before dinner.  Now that its nice out (hopefully winter is REALLY over) and we can go on family bike rides, I am hoping it will help me drop some of the weight that crept on too easily while I sit at a desk all day long at work.  Unfortunately, reading, quilting and cross stitching don't count as aerobic exercise.

To help celebrate Easter, I wanted to send cards to family and a few friends.  My card making process starts with perusing the cardstock in the Oasis to see what would work.  I found half a pack of a beautiful yellow and an assortment of pink and green scraps.  Perfect.

I looked through my stamp sets trying to find something that would work for Easter.  Nothing really stuck my fancy, so I headed to JoAnn's and Michael's.  (They are right down the street from each other, which makes it convenient when on a crafty run)  I couldn't find any stamps or stickers that would work, but I did come home with 15 yards of fabric!   (More on that in another post)

Back to my stamp sets I went, and selected one I got years ago from Stampin' Up. While not typical Easter fare like a bunny, basket, or eggs, there two good possibilities in the set.

So here are all of the paper materials, a set of markers, an eyelet border punch, and an oval shape maker from Creative Memories with two different blades.


First, I cut the yellow paper in half to make two cards per sheet.  Then I used the eyelet punch on the right side of just the front of the card.
Next, I cut the pink scraps to fit the length of the card and using the matching ink (I think they were both Perfect Pink) I stamped the flower shape. so that it gave the pink paper a subtle pattern.  Then I cut a white oval with the blue blade and the green paper with the green blade, so that the green would make a nice frame for the white. 
For the stamp, I tested both the butterfly and the flower.  The flower filled the oval space better and gave more of an opportunity for color.  I used the thick end of the markers to color the stamp and then stamped each white oval. It seemed a little blank still, so I made a border of dots with the fine side of the pink marker. 
Here's how it all came together:

For the sentiment inside, I printed out the first and fourth verses of my favorite hymn, "Joyful, Joyful We Adore Thee":

Joyful Joyful we adore thee,
God of glory, Lord of love,
Hearts unfold like flowers before thee, 
Opening to the sun above.
Melt the clouds of sin and sadness;
Drive the dark of doubt away.
Giver of immortal gladness,
Fill us with the light of day!

Mortals join the happy chorus
Which the morning stars began;
Love divine is reigning o'er us,
Binding all within its span.
Ever singing, march we onward,
Victors in the midst of strife;
Joyful music leads us sunward,
In the triumph song of life!


I have loved this hymn since I was a child, partly because you can't help but sing it at the top of your lungs.  I think that singing Henry J. van Dyke's words and Beethoven's beautiful music are the perfect way we can celebrate Easter every day and shout the Good News: 

He is Risen!
He is Risen Indeed!

Happy Easter, my friends.


Wednesday, April 9, 2014

Sam's Football Quilt - In Progress

You must have thought that I dropped off the face of the blogging earth.  I'm still here.  I could blame Nora Roberts for the second installment in "The Cousins O'Dwyer Trilogy" as reading it certainly distracted me for a few days.  (Now I have to wait until November to find out how they vanquish the evil wizard). I have been working hard on a few projects since I last posted, but some projects take longer than others and sort of evolve as you go.

Sam's football quilt is a good example.

Sam will be 13 in June.  It's hard to believe that my sweet baby is now 5'9" (with no sign of stopping).  Obviously the baby quilt I made for him 13 years ago isn't going to cut it any more.  (This is the big guy holding it.)

He is a HUGE football fan and a walking encyclopedia of football facts and statistics. Making him a quilt with a football theme was an obvious choice.  I started gathering fabric with football prints, (nothing that was specific to a team) and greens and browns to complement the theme fabric.

The quilt pattern I choose was actually a baby quilt from Winter 2011 issue of Quilts and More.  The original pattern was a square, but I planned to make it 4 blocks by 8 blocks instead to make it longer.  I also made it wider by changing a two square block into a four square block.

When I was done with all the blocks and laid them out on the floor, it still didn't seem wide enough for the big guy. Also, the greens and browns worked like camouflage and blended together.  Using white sashing solved both problems, by setting the blocks apart and making the quilt wider and long enough that I decided to go with seven rows of blocks rather than eight.


The quilt still didn't seem wide enough though.  I gathered up the scraps and sewed a quick border alternating the green and brown prints.  The border will go down each side. (I'm still working on this part)
Now I am happy with the size the quilt will be and soon I'll head to JoAnn's for some batting.  Sam already chose a sports themed flannel for the back (I have to make sure that I have enough of it now that I added to the width!).  I am planning on machine quilting it with a diamond pattern (no squiggly lines for me yet!) although I might hand stitch a football in the center of the larger blocks.

I am sure that this will be a quilt Sam can use for a long time.  Once this one is done, I can move on to the other quilts on the UFO list.  There's Jamie's, Peaches', Maria's, a couple of baby quilts... well you get the idea.

Wednesday, March 12, 2014

Snow Day Catch Up!

Today is a Snow Day! We have already had quite a few this winter, although some were more like Frigid Cold Days, when the wind chill factor was -20.   We are under a blizzard warning, so the six of us are hunkered down. I have already baked a batch of cookies and a loaf of banana bread.  The younger three kids tried going outside for a little bit but the snow isn't packing, and it is COLD.  Soon, I want to break out some board games, but for now everyone is attached to a screen. Phil is playing Skrym on his PS3, Sam is playing on the Wii, while Max is battling someone in Pokemon on his DS, and I am pretty sure that Brooke and Vince are crafting some mines.  So that gives me the chance to share some projects.

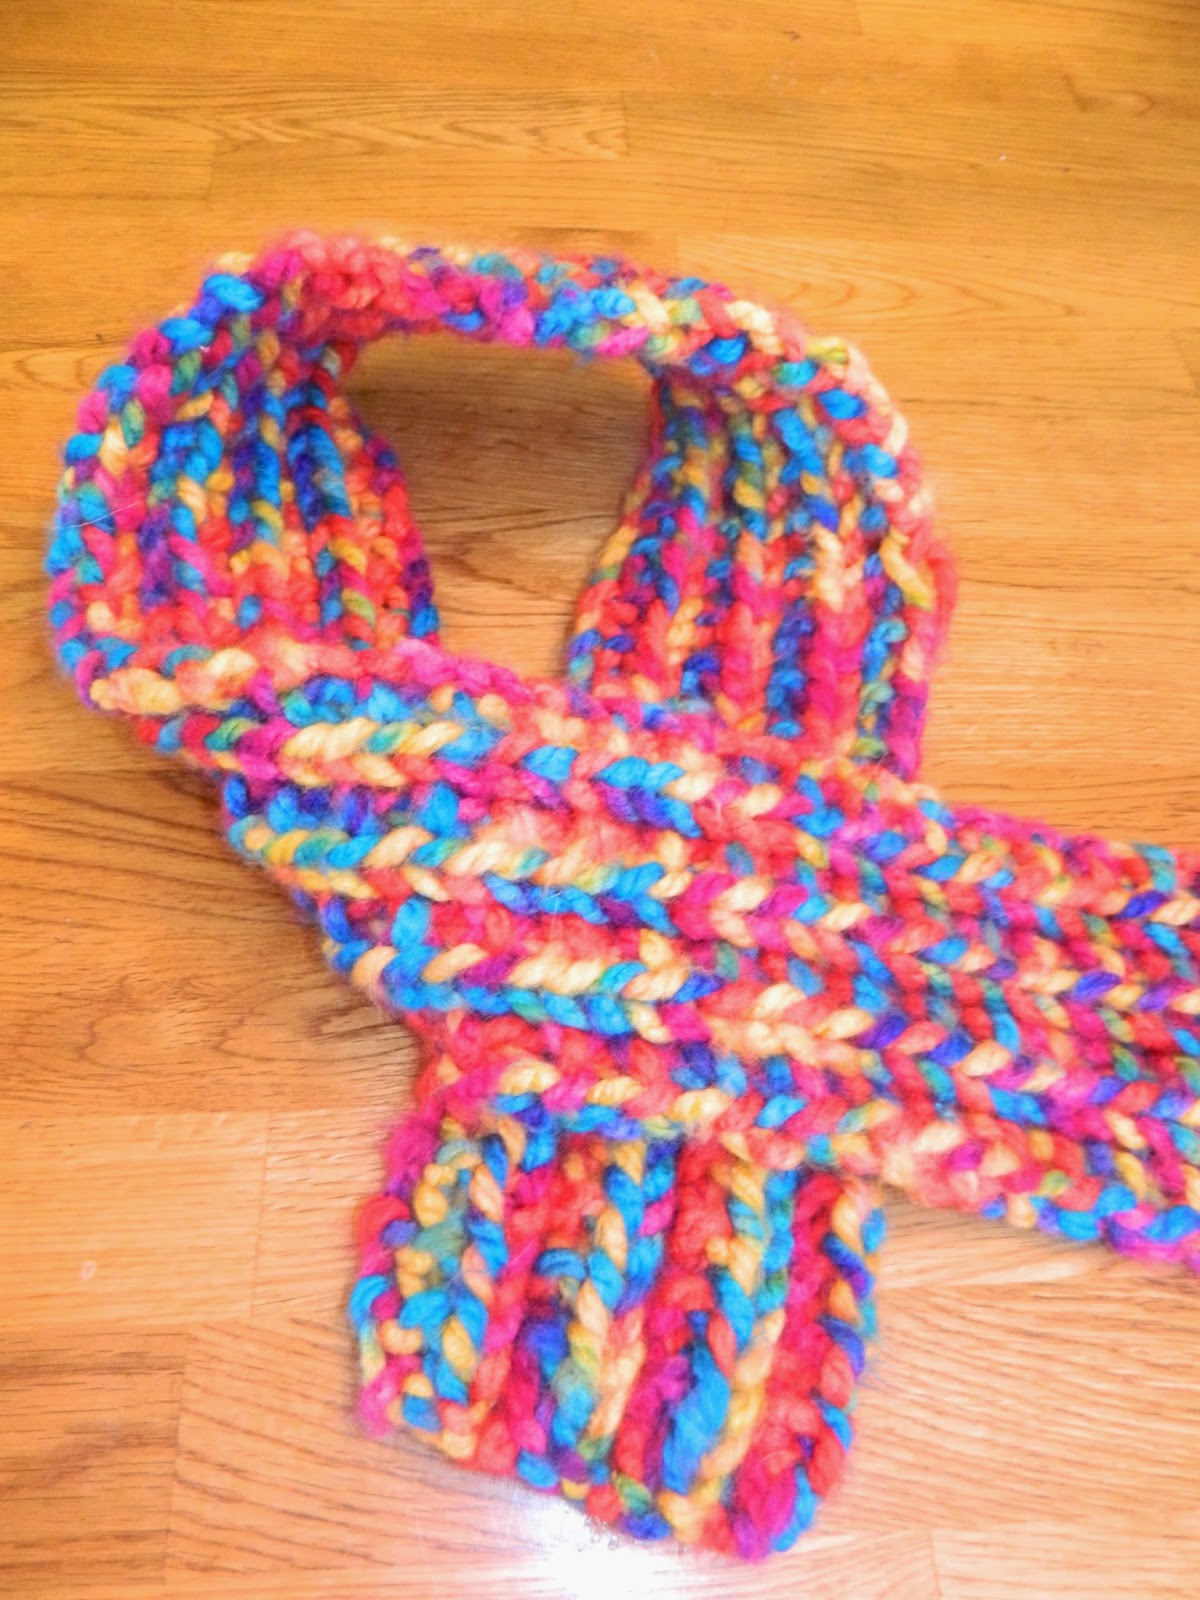
Once I finished the ruffle scarf, I went back to the yarn stash to see what other scarves were waiting to be made.  I bought this rainbow yarn years ago when a fabric store was going out of business.  I knew that Brooke would love the bright colors, and that it would go with any coat as she gets older.  The stitch pattern is very easy and with such a thick yarn on 17 needles, the scarf worked up very quickly.   I found the pattern on Pinterest called a  Scrunchable Scarf.   Cast on in a multiple of 3 (I did twelve for Brooke's) and then Knit 2, Purl 1. Because of the multiple of three it makes its own pattern of knit row, purl row, and moss row.  Brooke loves it - she gave me a big hug when I gave it to her.


Next up, I finished my St. Patrick's Day ribbon wreath.  For this one I did buy all the shamrock ribbon but I used the plain greens left from Christmas, so I kinda used stuff up, right? I love having that bit of sparkle on some of the ribbons, and how the orange pops, in honor of the Irish flag colors.  I just started working on one that for a dear friend of mine next.  I gave her a Christmas ribbon wreath, which she has hanging on her door in her retirement community. Since it's March, I thought she would like something she could leave up all the time.  Purple is her favorite color, so I have a nice variety of purple ribbons for her.

After 16 years, I finally took my sewing machine in to be serviced.  The tension has been so off, (I think because the bobbin wasn't winding at the right tension) that it has been hard to work on anything without getting extremely frustrated.  If you sew too, you know those little loops that form on the back of your seam when the tension isn't right.  So annoying.


The last quilt I worked on is still a work in progress but I can finish it without the machine. I pieced the top of this autumn log cabin before Sam was born (He's almost 13) and since it was one of the very first things I had ever done, I made the mistake of using the polyester batting. It made for a rather puffy quilt when I machine quilted in the ditch in the log cabin section.  My intention has always been to hand sew leaf shapes in the border, using a gold metallic floss. I thought it would pick up the gold that is in some of the dark fabrics.  I used to have several leaf shaped copper cookie cutters (they had a purpose too, but I can't remember what it is) that would be perfect for this task. Unfortunately, I have no idea where they have gone. I know where they used to be before we moved. Now, not so much. Plan B - I will find some leaf shapes online and make my own templates.  Of course, ask soon as finish the quilt I'll find the cookie cutters. Never fails, right?

Hopefully, the Autumn Log Cabin will be another item crossed off the UFO list soon.

Time to go round everyone up for some game time.  I hope that you are all warm and safe and happily crafting wherever you are!


Friday, March 7, 2014

My first "ruffle" scarf

I don't know about you, but when I go to a craft store for one thing, very often I bring home a lot more than I intended.  Stickers, paper, a yard of fabric, a skein of yarn...or two...or three.  When I finished Vince's scarf I went looking through all the boxes and bags of "impulse" skeins to see what might be the next project.  That's when I found a skein of purple yarn, the kind that makes the ruffle scarf.


I had not made a ruffle scarf before, but I followed the directions on the inside of the skein wrapper.  I worked on it for a bit but it didn't seem to be working.  Instead of a ruffle, it made kind of bell shape.  So I went online and found a very helpful blog that said to knit every other stitch on the flat edge of the yarn. This did the trick and soon I had a very cute scarf.

It didn't take very long to make, as you only knit six stitches a row, and the yarn ruffles by itself.  I can see many more ruffle scarves in the future for friends and family alike.  There are so many pretty yarns to choose from, some with sequins and sparkles, I might just have to make them all!


Sunday, March 2, 2014

Baby Boy quilt #1

About five years ago I had six friends who were having babies, and one was a two-for-one! I set out to make quilts for all those babies, and got a good start on them, but sadly, most are still sitting in the craft oasis in different stages of being finished.


This baby boy quilt was one of those projects.  I forget where I saw the idea of the columns of small strips with the border in between.  It's a great way to use up scraps and worked up pretty quickly.  Think of the possibilities with this quick pattern - white strips with red and green Christmas fabrics, black strips with Halloween fabrics, brown strips with pink baby girl fabrics.  

I cut the brown strips into 2 and a half inch strips from salvage to salvage.  The blue strips were also cut to 2.5 wide and 4 inches long (being that most of the fabrics were leftovers from other projects, I think that was as long as I could go). If you wanted to make the vertical strips longer, (if you were doing a project for a kid or adult) I think that would work as long as the widths of the strips are the same.

Once I had finished piecing, I wasn't quite sure how to quilt the layers together (which is why it sat for so long).  Stitching in the ditch along the brown borders was easy and an obvious way to quilt, but I was at a loss for how to quilt in the blue area.   My sewing machine is just a regular Singer, not designed specifically for quilting, so doing straight lines when quilting is all I have tried.

Since the Candy Corn quilt had turned out so well, I figured I would try something a little more complicated for the baby quilt.  I grabbed a star shaped cookie cutter and used that as my template to draw stars along the blue sections of the quilt.  Then I machine quilted each star.  It took a few stars to get the tension just right in my machine (it's always been a bit touchy with the tension controls) but I thought they turned out well.  I used the same brown strips for the binding and ta-da!  another UFO is finished. 


As the baby I started this for is now a five year old boy in Pre-K, who is probably much more interested in cars, dinosaurs, and superheroes, this quilt will go instead to a new baby boy, who is the long awaited son of one of Phil's oldest friends.  I wish they lived closer so we could visit and coo over the little man, but I am happy knowing that a dear friend will enjoy it for years to come.